Do a gas leak test
Do an automated gas leak test on the Computer Numerical Control (CNC) screen or XPR® web interface if you suspect a cutting system gas leak.
| Warning | |
|---|---|
  | |
| Warning | |
|---|---|
| |
- For the XPR170® and XPR300®, with version U (or later) of the XPR firmware, you can do a gas leak test with all gas connect consoles, including Core™ and CorePlus™. With a firmware version before revision U, you can do gas leak tests only with VWI™ and OptiMix™ consoles.
- For the XPR460®, you can do a gas leak test with all gas connect consoles, including Core and CorePlus.
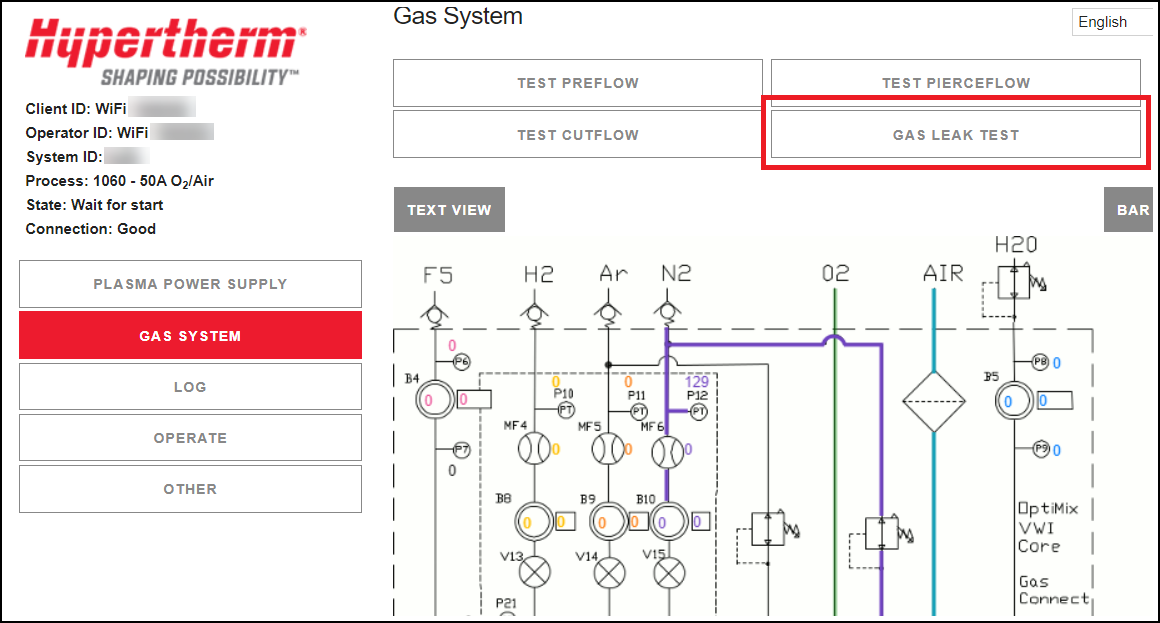
Gas leak tests in the XPR web interface
When you select GAS LEAK TEST in the XPR web interface:
- The GAS LEAK TEST button is highlighted with red to show that it is active, and the test has started.
- The active valves are identified with colored highlights.
- The gases shown on Line A, Line B, and shield are different for different process IDs. You can do a gas leak test for Line A (black) and for Line B (yellow) but not for the shield gas line (blue).
- The gases flow until you select the same button or select a different button that interrupts the test.
- After you complete a gas leak test in the XPR web interface, select the LOG button to see the result of the test.
- The Log screen shows if the test was successful.
- For a test that was not successful, look for information on the Log screen that identifies the point of failure.
- Use the information from the Log screen and the wiring diagrams for your system to find the location of the gas leak.