Do a gas leak test
Do an automated gas leak test on the Computer Numerical Control (CNC) screen or XPR® web interface if you suspect a cutting system gas leak.
| Warning | |
|---|---|
  | |
| Warning | |
|---|---|
| |
With version U (or later) of the XPR firmware, you can do a gas leak test with all gas connect consoles, including Core™ and CorePlus™. With a firmware version before revision U, you can do gas leak tests only with VWI™ and OptiMix™ consoles.
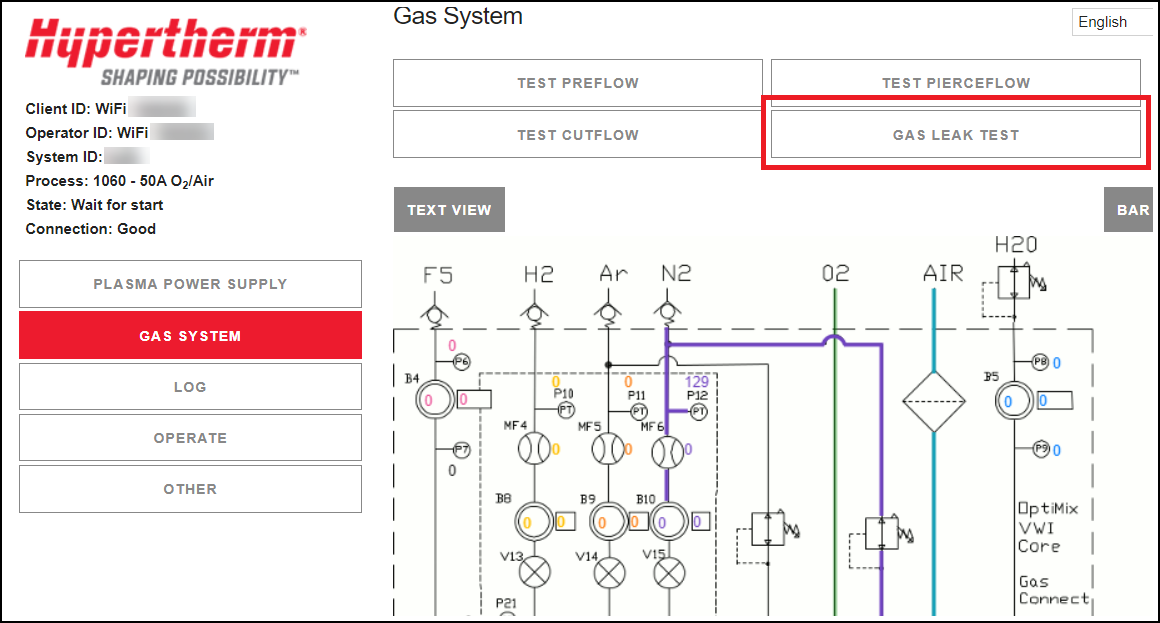
Gas leak tests in the XPR web interface
When you select GAS LEAK TEST in the XPR web interface:
- The GAS LEAK TEST button is highlighted with red to show that it is active, and the test has started.
- The active valves are identified with colored highlights.
- The gases shown on Line A, Line B, and shield are different for different process IDs. You can do a gas leak test for Line A (black) and for Line B (yellow) but not for the shield gas line (blue).
- The gases flow until you select the same button or select a different button that interrupts the test.
- After you complete a gas leak test in the XPR web interface, select the LOG button to see the result of the test.
- The Log screen shows if the test was successful.
- For a test that was not successful, look for information on the Log screen that identifies the point of failure.
- Use the information from the Log screen and the wiring diagrams for your system to find the location of the gas leak.