Troubleshooting for when the Hypertherm cartridge or torch is not ready to cut

The Torch Cap fault Light Emitting Diode (LED) illuminates when the torch or Hypertherm® cartridge is not ready to cut or is not able to cut.

Fault codes and fault LEDs

Fault code Fault LEDs Torch LED Description Stops the system from operating?
None The image shows the Torch Cap fault Light Emitting Diode.

ON

The image shows the torch Light Emitting Diode illuminated yellow.

Yellow

The Hypertherm cartridge was off, the torch was disconnected, or the torch was in the yellow lock (X) position during a restart. Yes

Corrective action for the Hypertherm cartridge and torch

  1. Move the torch-lock switch to the green "ready to fire" position.

    This fault can show when you do a restart while the torch-lock switch is in the yellow lock (X) position.

  2. Remove the Hypertherm cartridge, and reinstall it correctly.
  3. Reconnect the torch to the plasma power supply, and do a quick restart.
  4. Optional:: Machine torch: Lock and unlock the torch, or do a quick restart.

    This fault can be caused by removing the Hypertherm cartridge without first setting the torch-lock switch to the yellow lock position or setting the power switch to OFF (O).

  5. Optional:: Mini machine torch: Do a quick restart.

    This fault can be caused by removing the Hypertherm cartridge without first setting the power switch to OFF (O).

  6. If possible, do a test with a different torch that is known to work correctly.
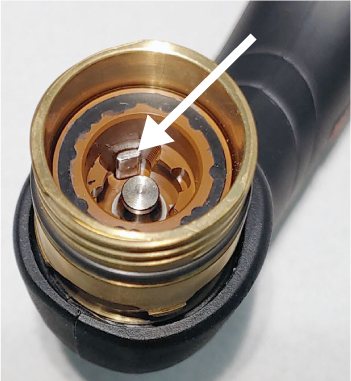
  7. Push down the plunger in the torch head and then release.
    The image shows the plunger in the torch head.
  8. If the plunger moves freely and goes back to its start position, speak to your distributor or authorized repair facility.

    There is possible damage in the torch or in the plasma power supply.