Use Ethernet LAN to get access to the XPR web interface
Do these steps to get access to the XPR® web interface through Ethernet Local Area Network (LAN).
You must have a computer-based device with a screen and a web browser that has support for the latest web standards.
-
Sign in to get access to the XPR web
interface:
-
Is this your fist sign in?
Option Description If no... Enter your user name and password. If yes... Go to the next step. 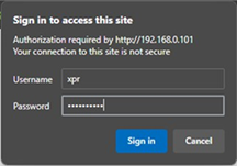
The default user name is "xpr" and the default password is "hypertherm."
-
Enter a new user name and password in the
XPR
Configuration
screen.

-
Is this your fist sign in?
- The plasma power supply is now connected.
- The main screen of the XPR web interface shows information about the connected plasma power supply in the top-left corner.
- If the Client ID and the Operator ID in the top-left corner are the same, you are in control of the plasma power supply and can set a process.
- Do the procedure in Connect to the plasma power supply with discrete to fully operate the cutting system. To fully operate the cutting system, you must also use discrete.
- Do the procedure in Configure Ethernet LAN settings if you want to change the settings.
- Refer to the instruction manual that came with your MTConnect kit if you want to configure MTConnect settings.