Configure Ethernet LAN settings
This information prepares you to configure Ethernet Local Area Network (LAN) settings.
You can
configure
Ethernet
LAN
settings with the
XPR®
web interface through one of these
connection-mode
options:
- Dynamic Host Configuration Protocol (DHCP)
mode
- DHCP mode is the default connection mode. DHCP mode is the best option if the plasma power supply is connected to a router or other device that has DHCP capability.
- In DHCP mode, the Internet Protocol (IP) address, subnet mask, and default gateway are automatically assigned to each plasma power supply that is connected.
- In DHCP mode, you can connect to and control multiple plasma powers supplies at the same time.
- Static
IP
mode
- Static IP mode is a good connection option if there is only one plasma power supply connected for each computer-based device with a screen.
- In static IP static mode, you must know the address of the local subnet you want to use, the subnet mask for that subnet address, and the IP addresses that are available.
- If you do not know the address of the local subnet, the subnet mask for that subnet address, or the available IP addresses, you must configure the router to set up a local network subnet. Use the instructions for the router to do this.
- Users who have experience with IP networks are best qualified to configure a router and set up a local network subnet. If you have questions or problems about how to do this, speak to your system administrator.
- Disabled mode
- Disabled mode disables the Ethernet LAN port on the expansion Printed Circuit Board (PCB).
- In disabled mode, the LAN port stays inactive (OFF) until you change the setting from disabled mode to DHCP mode or from disabled mode to static IP mode, or until the factory-default configuration is enabled again.
- MTConnect
- The Ethernet LAN setting for MTConnect is disabled by default.
- You must change the setting to enabled to use MTConnect.
- For information about MTConnect, refer to the instruction manual that came with your MTConnect kit.
- You must have a computer-based device with a screen, a web browser that has support for the latest web standards, and wireless or Ethernet LAN access to the XPR web interface.
- Do the steps in this procedure if using the XPR web interface through Ethernet LAN connection or wireless connection to configure Ethernet LAN settings.
- If using Ethernet LAN settings through serial RS-422 or EtherCAT® to configure Ethernet LAN settings, refer to Serial RS-422 and EtherCAT commands in the CNC Communication Protocol for the XPR Cutting System (10085793).
-
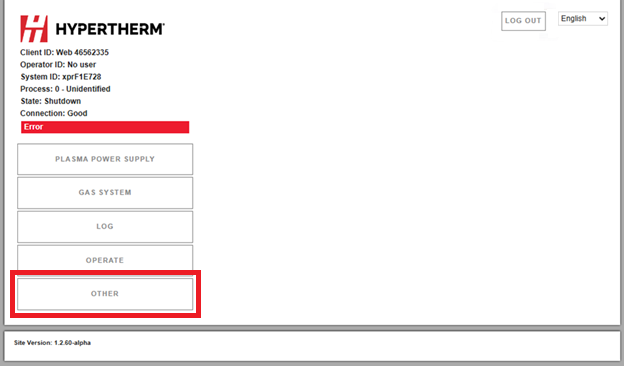
On the main screen for the XPR web
interface choose OTHER.
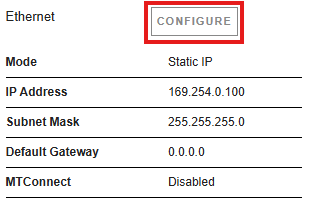
-
Choose CONFIGURE.
-
Choose the settings you want for the connection-mode option you have (Static
IP,
DHCP) or MTConnect (Enabled or
Disabled).
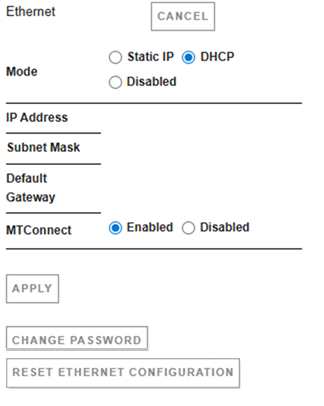
-
Choose APPLY to save the choices you made.
Restart your cutting system if the XPR web interface prompts you to restart.
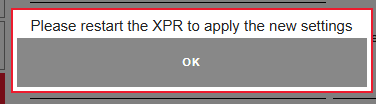
The Ethernet settings are enabled and the main screen for the XPR web interface shows.
Choose OTHER to change or cancel an Ethernet LAN setting.